Showing posts with label pizza. Show all posts

Thursday, November 1, 2012

Frying Pan Pizza


Yes, you can have homemade pizza even if you do not have an oven...  
...or maybe you have a broken oven... 

I am currently in this dilemma.  God has moved me and my family to a wonderful part of the country (hence the Long Time-No Post), and I love where I am, however, the temporary, furnished, living quarters that I am in has no oven.  I am working with
a microwave, 
 
  two burners, 

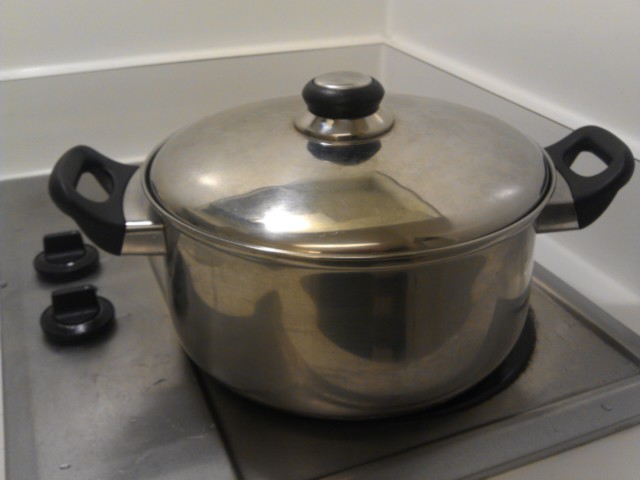
one small stock pot (probably holds 1 gallon), 
 two, 1 qt sauce pans, 

  and a 10" frying pan.  


Cooking utensils include 1 metal spatula (which I did purchase at the dollar store... only a plastic one was here when moving in, and it would melt when it got hot..hhhmmm.),


and 1 plastic spoon/ladle thing.  


 Other than than I have 4 each metal forks, knives, and soup spoons, and also collection of "our best" plastic-ware direct from Target!  


 I did bring my chef knife with me, for which I am extremely thankful and there is a small somewhat decent cutting board here.


So all in all, I have had the challenge of thinking up meals for four people with limited equipment.  On top of that, figuring out the gluten, egg, peanut, etc - free meals for my son all at the same time.  Before moving, our family tradition had become homemade pizza every Friday night, which meant making a gluten-free crust for my son and the "normal" high gluten crust for everyone else.  After moving it had been about three weeks or so since we had pizza of any kind because it is so hard to find a pizza shop which sells a gluten-free crust, and we were all really craving some of that comforting homemade pizza...  You know how it is!  So, one Friday night, I got my determination on, and got all the ingredients, pulled out my stock pot "mixing bowl" and got to work!!  In my little kitchen area, I managed to make a HUGE mess (I am really good at that, just ask my husband!) but came up with this GREAT FRYING PAN PIZZA!

  1. Simply use the Buckwheat Pizza Crust recipe that I have already posted previously, EXCEPT add more warm water to the mixture to make it closer to the thickness of a pancake batter. Don't worry about over mixing, gluten-free flours typically cannot be overworked.  I usually let the mixture rest maybe a half hour before using.
  2. Heat a heavy bottom frying pan (a cast iron one would work great!) to medium low heat, have the lid ready nearby.  
  3. Place enough butter in the pan to coat the bottom well.
  4. Spread the mixture carefully around the pan until it reaches the sides, if the batter is too thick, this will not work and you will end up with a very thick clump of half cooked dough in your pan.
  5. Place the lid on the frying pan and let it cook for about 3-5 minutes.  The bottom should be cooked and light brown and the top should be set, not raw, but it will look undercooked.  
  6. Now is the time to flip!  Turn the crust over, CAREFULLY, with your dollar store spatula, as not to break the dough nor bend the $1 spatula.  
  7. Immediately after flipping the dough, spread on your choice of sauce, cheese or cheese substitute, and toppings.
  8. Cover with the lid once more for 3-4 minutes, until the cheese is melted.  It will not get bubbly and golden like it would in a "normal" oven, however it is awesome pizza when an oven is not available.
Step 4, spreading the batter...
Step 5, after it has been cooked with lid on...
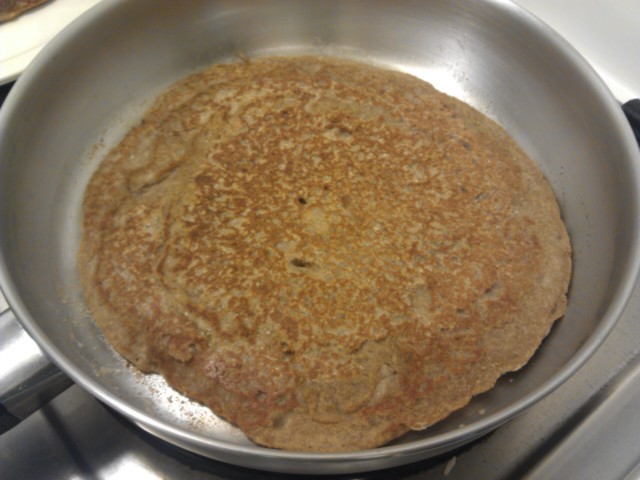
Step 6, a finished gluten-free pizza crust.
I am pretty sure that this technique would also work on a grill or over a campfire, however I would suggest making sure the heat is at a medium to medium low level to prevent burning the bottom while you add your toppings and melt the cheese.

Even if you have a working oven, have fun trying this technique out... It is fun, even though it takes a while because it makes one personal size pizza at a time, but it is SO worth it!

**********************************************************************************
MAYBE you can have gluten (lucky), and would like a good quick pizza dough recipe??  Here it is; the one I used for the rest of the frying pan pizzas.  Be sure to cook your gluten-free crusts first, if having to use the same frying pan for both type crusts in the same meal, to prevent cross-contamination!

FULL GLUTEN PIZZA DOUGH  *Caution: do not consume if you are allergic to gluten!*

1 1/2 cups warm water
1 packet (1/4 oz.) of instant (rapid rise) yeast
1 Tbs granulated sugar
2 Tbs. olive oil
4-6 cups of all-purpose unbleached flour (bread flour works great for this too, I just happened to have AP flour)
1/2 Tbs salt

Raw full-gluten pizza dough placed in frying pan.
In a large mixing bowl (or small stock pot, as I have) place the warm water.  Sprinkle the yeast over the water, and then sprinkle the sugar over the yeast.  Add the olive oil and about 3 cups of the flour, and the salt.  Stir this until it is smooth then gradually add as much of the remaining flour as needed to get a nice firm, yet soft and elastic dough.  A little stickiness is good with pizza dough.  You will most likely end up having to kneed in the last cup of so by hand as it will get to thick to stir.  If you have a mixer that will handle yeast doughs, you may accomplish the same thing in half the amount of time and effort.  I do not currently have my mixer.  :o(
Full gluten pizza crust (flatbreat) almost done...
Once the dough is mixed, let it rest for about 1/2 hour, then divide it into about 8-10 pieces.  Flatten each piece into a 8"-10" round (whatever will fit into your frying pan) making sure that it is fairly thin keeping in mind that it will puff significantly as it cooks.  At this point, add the flattened dough to your warmed, buttered pan and cook the dough and pizza the same as mentioned above from step 5 - step 8.

When I made these pizzas I only made four pizzas total for that meal, so obviously I had a lot of dough left over.  I decided to cook all the remainder as just plain flatbread because I had no other way to keep it for later.  This worked out extremely well, because it refrigerated great for up to 3-4 days, just storing it in a plastic food storage bag and was super convenient to pull the crusts out and make up pizzas when I didn't have the time, or space, to go into all the effort to mix up dough again.  I used the same frying pan technique, I just warmed the crusts in the pan before adding the toppings.  These crusts would also freeze good for 1-2 months.


Finished full-gluten pizza crusts.


Monday, July 16, 2012

Soft, Fluffier Buckwheat Pizza Crust

So, it's been a while since the last post.  Vacation has a way of making one enjoy the time away from all technology, or at least for me.  As much as computers/internet etc is helpful for keeping in touch with people and learning new information, it is so nice to take a break from it for a while.  My first blog back is about a wonderful gluten-free pizza crust - now that you are eating gluten-free, you should still be able to eat pizza and enjoy it too! 


This crust is awesome!  It can be made ahead of time and kept in the freezer until time to use and it's quality is still as delicious as fresh.  I even took these on vacation to use for my son - they traveled, froze, and refrigerated well.  In addition to traditional style pizza, we also make mexican/taco pizza on these crusts, and use them for garlic breadsticks, and gluten-free croutons, by keeping them in the freezer and thawing them as needed.  You will love how easy this recipe is and the versatility of having it on hand!  For anyone who cannot have the masa harina that is in the recipe you can use same amount of quinoa flour or all buckwheat flour, or feel free to substitute in a different one to your liking!

1 c. Warm Water
1 1/2 tsp yeast, active-dry or instant
2 Tbs Sugar
2 Tbs Olive Oil
2 Tbs. flaxseed egg substitute mixture (see egg-substitute post)
1 3/4 c. Buckwheat flour
1/2 c. Masa Harina
1 tsp. Baking Powder
2 tsp. Salt

In a large mixing bowl, dissolve the yeast in the warm water, and sprinkle with the sugar.  Add the olive oil, flaxseed mixture, buckwheat flour, masa harina, baking powder, and salt.  Stir by hand with a wooden spoon until smooth and dough-like.  This mixture should be very sticky, it will not be as elastic as a "normal" pizza dough, and will not be thick enough to hold it's shape in a ball, but it should not be runny.  It should be just a little moister/stickier than biscuit dough.  When all ingredients are combined thouroughly, drizzle some olive oil over the top (maybe 1-2 Tbs.) just to prevent the top from drying out, and then cover loosely with a clean dry towel and let rest for about an hour.  It should rise a little bit, it probably won't double.  During this time, preheat oven to 475 degrees.  Grease a 14 inch pizza pan.  After the dough has rested, dump the dough out onto the greased pizza pan.  You will need to sprinkle the top of the dough with some additional buckwheat flour, and then using your fingers press gently into a circle, you should be able get it pretty close to a 14" circle.  Place in the oven and bake for about 10 mins, the top will begin to crack in places and the bottom will begin to brown.  Remove from oven and cover with your chosen pizza sauce/toppings.  Return to oven and continue cooking for another 10 mins until all toppings reach the desired doneness and bottom should be browned and slightly crispy.  Remove and let sit for 2-3 minutes before cutting.

If you are just making the crusts to put in the freezer.  Bake for about 15 mins when you first put them into the oven.  The bottom will be golden brown, the top will be cracked in places and it will feel firm to the touch.  Remove crust from the oven and cool on a wire rack.  They keep great in the freezer in an airtight container, or you could wrap them in plastic wrap and then foil and then freeze.

This recipe makes one 14" pizza or two 8" pizzas.  When making crusts for the freezer, I like to double the recipe and make four 8" pizza crusts.  They fit better in my freezer that way.


We try to avoid all Nitrates and Nitrites, so for the pepperoni seen in the pizza pictures above we used the Hormel Natural Pepperoni - it is found in a small brown and red box with the Hormel products in the supermarket.  It contains no Nitrates or Nitrites.


Monday, June 18, 2012

Thin Pizza Crust

This pizza crust comes out thinner and crunchier than a regular pizza dough.  I guess some would compare the final product to the texture of a frozen, ready to cook pizza that you can purchase at your local grocery store.  We do like this crust a lot!  The batter is very easy and versitile, as well as the finished crusts.  This recipe uses mainly garbanzo bean flour, so it is super healthy, with lots of protien and the flavor goes great with the pizza sauce and any toppings you like.   (unfortunately I have no pictures of this yet, but will post one the next time I make it.)

1 c. garbanzo bean flour
1/2 c. cold water
1 T olive oil
1 tsp salt
1/2 tsp granulated onion
1/4-1/2 tsp granulated garlic
1/2 tsp sugar
2 Tbs flax seed egg substitute mixture (see info in the "Egg Substitutes" post)
1/4 c. Parmesan cheese (optional)

Combine all ingredients in a food processor and blend until totally smooth.  This is almost fail proof, you could blend it for 30 secs or several minutes and results won't change as long as the batter is smooth.  This should look like a pancake batter consistency, may need a little more water added, just add a couple tablespoons at a time until you get the desired consistency.  You can refrigerate this for up to three days until ready to use.

When ready to cook the batter:  Heat a 12" cast iron pan over medium heat, until it begins to smoke (but you don't want to fill your house with smoke, lol).  Example: my stove burners have heat levels that go from 1-10, 1 being low, 10 being high, and I put it on 5.  Place 1 Tbs of butter in the pan and let it melt. (if you are dairy free, coconut oil or olive oil should work fine for this).  When the butter is completely melted, ladle about 1 c. of batter into middle of the pan, the batter should spread out a little bit when put in there, but not run to the edges by itself.  Use an offset metal spatula (like one you would use to frost a cake...) to spread the batter almost to the edges of the pan.  Essentially you are making a pancake out of this batter.  Let this cook on the first side for about 5 mins or until the top of the batter no longer wet to the touch, and it will look like it is smoking from underneath and will be browned, similar to how a tortilla may look, but not black.  Carefully, using a large round shaped spatula, flip this large "pancake", and cook until the second side is browned.  Remove from pan and cool on a wire rack.  When these are cool they can be stored in the refrigerator for up to 5 days until using.

When making the pizza on the crust:  I like to use canned crushed tomatoes, spreading this onto the crust, and then sprinkle on the sauce a combination of granulated onion, granulated garlic, dried basil, dried oregano, salt and pepper, sometimes some parmesan cheese, and then the pizza cheese and toppings*.  For those of you who are dairy free or vegan, feel free to use whatever cheese you like.  Then bake in a preheated 475 degree oven on a cookie sheet or pizza pan until cheese is melted and bubbly, sometimes a few golden spots are good, and the crust should be slightly crunchy/crispy on the bottom.


This recipe makes one crust.  I like to quadruple this recipe to get 4-5 crusts and keep a couple of the crusts on hand in the fridge for lunches or spur of the moment gluten-free meals.

* My son's favorite topping is the Hormel Non-Cured Pepperoni, comes in a small brown and red box- it has no nitrates/nitrites or other preservatives.  I love this pizza with caramelized onions, diced tomatoes, and other veggies!  A lot of times I will eat this crust over the original pizza crust!