Showing posts with label vegetarian. Show all posts

Monday, November 5, 2012

Dal Makhani & Naan

Dal Makhani is a delicious Indian dish typically consisting of Urad Dal (black matpe beans or black lentils) and Red Kidneys.  It is cooked into a creamy stew-like consistency, served warm with a traditional Indian bread such as Naan or Paraatha.  This is a vegan, gluten-free, egg-free dish.  Serve with the Naan bread recipe which follows or the gluten-free flatbread suggestion, also below.

(this recipe is adapted from a punjabi dal makhani recipe found on Food.com)

Punjabi Dal Makhani
Servings: 4-6

Ingredients
3/4 cup Urad Dal ( black matpe beans or black lentils)
1/4 cup red kidney beans ( rajmah)
2 teaspoons cumin seeds
8 garlic cloves, pasted
2 inches gingerroot, grated
1 teaspoon garam masala powder
1/2 cup fresh cream
1 teaspoon red chili powder
3 tablespoons butter
2 extra large tomatoes, peeled, seeded and diced
1 onions, finely diced
1 tablespoon oil
Salt
Fenugreek, powdered – to taste

Directions
Soak whole black urad dal and red kidneys overnight in 3-4 cups of water.
Cook the soaked dal and rajma in the same water with salt, red chili powder and half the grated ginger until dal and kidneys are cooked and soft.
Heat oil and butter in a thick-bottomed pan. Add cumin seeds, when it crackles add onions and sauté until golden brown.
Add remainder of ginger, along with the garlic and tomatoes. Sauté until tomatoes are well mashed and fat starts to leave the masala. Add boiled dal and kidney beans to this. Do not add the liquid at first.  Mash the dals with the back of the ladle while stirring continuously, this gives that creamy texture to the dal .
Add the liquid and some water if required and simmer on very low heat for fifteen minutes.
Add fresh cream and garam masala powder let it simmer for another five minutes. Finish off with a couple of pinches of Kasoori methi (fenugreek) powdered.
Serve hot with Naan or Paraatha.
Tip: Replacing the tomatoes with 4 tablespoons of thick tomato paste will enhance the taste and color of the dish.


 My Favorite Naan Recipe Ever
(Recipe adapted from The All-New All-Purpose Joy of Cooking, by Irma S. Rombauer, Marion Rombauer Becker and Ethan Becker, the 1997 revision)

Warning:  This Naan recipe is NOT gluten-free, but is absolutely delicious for anyone who can have gluten...  I would highly recommend this accompany your Dal Makhani.  (for a gluten-free option please see below.)

 Traditional Naan in India is baked in the clay Tandoori ovens, but in a regular oven as most of us have, Naan can be made on a baking stone or an inverted baking sheet.  Just be sure to preheat your oven and stone/baking sheet before you are ready to bake your naan.
For more information on how traditional naan is baked and the use of Tandoori ovens, there are lots of incredible YouTube videos on this as well as ideas for making your own Tandoori oven (which I would love to try one day!).  Simply go to YouTube and search or do a Google search...Have fun checking them out!

Combine in a large mixing bowl or the bowl of a heavy-duty mixer:
2 c. bread flour
1/2 tsp. salt
1 1/4 tsp instant dry yeast (if using active dry yeast please remember to dissolve yeast in 2 Tbs. warm water before adding to the flour, you will not need to dissolve instant dry yeast.) 

Then Add:
2 Tbs. melted butter or vegetable oil (or you can substitute olive oil or coconut oil if desired)
3/4 c. yogurt or buttermilk, at room temp (if you have neither you can use milk and add 2 tsp of vinegar to it, and let it sit to sour, it will "curdle" slightly, this is good.)
1 tsp - 1 Tbs water as needed.

Mix by hand or on low speed until a soft ball of dough is formed.  Knead for about 10 minutes by hand or with the dough hook on low to medium speed until the dough is smooth and elastic.  Transfer the dough to an oiled bowl and turn it over once to coat.  Cover with plastic wrap and let rise at room temperature for about 1 1/2 hours.  Punch the dough down and divide equally into 4 pieces.  Roll into balls, cover, and let rest for 10 minutes.

 Place a baking stone or inverted baking sheet in the oven and preheat to 475 degrees F.  Roll out each ball of dough into an oval 8-10 inches long and about 1/4 inch thick.  Place as many ovals as will fit without touching directly onto the baking stone or baking sheet and bake until each oval starts to get puffy flip over and bake for about 1-2 minutes longer.  Remove from oven and brush the tops if with 1-2 Tbs melted butter and sprinkle with about 2 Tbs minced scallions, green onions, or poppy seeds or a combination if desired and fold in half keeping the butter and toppings on the inside.  Place naan in a cloth-lined basket or plate, keep covered and serve warm.


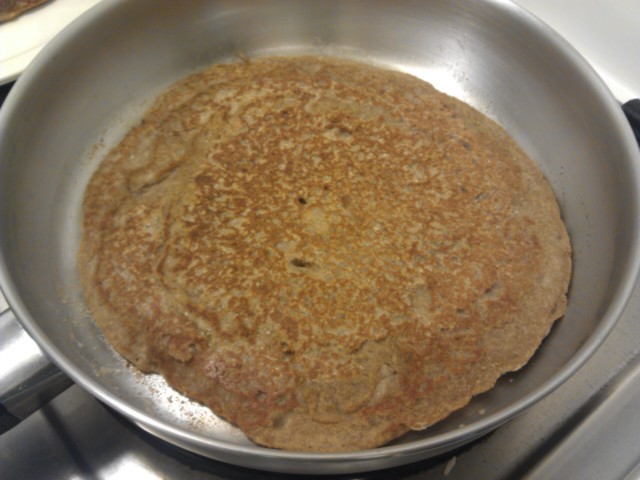
FOR GLUTEN-FREE FLATBREAD:
If you would like to enjoy the Dal Makhani above with a gluten-free flatbread, please try the Buckwheat Pizza Crust recipe and just bake it like you would for pizza without adding the pizza toppings.  When it is finished baking simply brush on some melted butter and sprinkle with sliced green onions or you can use garlic butter as well.  (You will not be able to successfully fold this bread in half as directed with the naan.)  You may just leave it plain if you prefer. Anyway you eat it, this is a delicious gluten-free option to accompany your Dal Makhani. 

Thursday, November 1, 2012

Frying Pan Pizza


Yes, you can have homemade pizza even if you do not have an oven...  
...or maybe you have a broken oven... 

I am currently in this dilemma.  God has moved me and my family to a wonderful part of the country (hence the Long Time-No Post), and I love where I am, however, the temporary, furnished, living quarters that I am in has no oven.  I am working with
a microwave, 
 
  two burners, 

one small stock pot (probably holds 1 gallon), 

 two, 1 qt sauce pans, 

  and a 10" frying pan.  


Cooking utensils include 1 metal spatula (which I did purchase at the dollar store... only a plastic one was here when moving in, and it would melt when it got hot..hhhmmm.),


and 1 plastic spoon/ladle thing.  


 Other than than I have 4 each metal forks, knives, and soup spoons, and also collection of "our best" plastic-ware direct from Target!  


 I did bring my chef knife with me, for which I am extremely thankful and there is a small somewhat decent cutting board here.


So all in all, I have had the challenge of thinking up meals for four people with limited equipment.  On top of that, figuring out the gluten, egg, peanut, etc - free meals for my son all at the same time.  Before moving, our family tradition had become homemade pizza every Friday night, which meant making a gluten-free crust for my son and the "normal" high gluten crust for everyone else.  After moving it had been about three weeks or so since we had pizza of any kind because it is so hard to find a pizza shop which sells a gluten-free crust, and we were all really craving some of that comforting homemade pizza...  You know how it is!  So, one Friday night, I got my determination on, and got all the ingredients, pulled out my stock pot "mixing bowl" and got to work!!  In my little kitchen area, I managed to make a HUGE mess (I am really good at that, just ask my husband!) but came up with this GREAT FRYING PAN PIZZA!

  1. Simply use the Buckwheat Pizza Crust recipe that I have already posted previously, EXCEPT add more warm water to the mixture to make it closer to the thickness of a pancake batter. Don't worry about over mixing, gluten-free flours typically cannot be overworked.  I usually let the mixture rest maybe a half hour before using.
  2. Heat a heavy bottom frying pan (a cast iron one would work great!) to medium low heat, have the lid ready nearby.  
  3. Place enough butter in the pan to coat the bottom well.
  4. Spread the mixture carefully around the pan until it reaches the sides, if the batter is too thick, this will not work and you will end up with a very thick clump of half cooked dough in your pan.
  5. Place the lid on the frying pan and let it cook for about 3-5 minutes.  The bottom should be cooked and light brown and the top should be set, not raw, but it will look undercooked.  
  6. Now is the time to flip!  Turn the crust over, CAREFULLY, with your dollar store spatula, as not to break the dough nor bend the $1 spatula.  
  7. Immediately after flipping the dough, spread on your choice of sauce, cheese or cheese substitute, and toppings.
  8. Cover with the lid once more for 3-4 minutes, until the cheese is melted.  It will not get bubbly and golden like it would in a "normal" oven, however it is awesome pizza when an oven is not available.
Step 4, spreading the batter...
Step 5, after it has been cooked with lid on...
Step 6, a finished gluten-free pizza crust.
I am pretty sure that this technique would also work on a grill or over a campfire, however I would suggest making sure the heat is at a medium to medium low level to prevent burning the bottom while you add your toppings and melt the cheese.

Even if you have a working oven, have fun trying this technique out... It is fun, even though it takes a while because it makes one personal size pizza at a time, but it is SO worth it!

**********************************************************************************
MAYBE you can have gluten (lucky), and would like a good quick pizza dough recipe??  Here it is; the one I used for the rest of the frying pan pizzas.  Be sure to cook your gluten-free crusts first, if having to use the same frying pan for both type crusts in the same meal, to prevent cross-contamination!

FULL GLUTEN PIZZA DOUGH  *Caution: do not consume if you are allergic to gluten!*

1 1/2 cups warm water
1 packet (1/4 oz.) of instant (rapid rise) yeast
1 Tbs granulated sugar
2 Tbs. olive oil
4-6 cups of all-purpose unbleached flour (bread flour works great for this too, I just happened to have AP flour)
1/2 Tbs salt

Raw full-gluten pizza dough placed in frying pan.
In a large mixing bowl (or small stock pot, as I have) place the warm water.  Sprinkle the yeast over the water, and then sprinkle the sugar over the yeast.  Add the olive oil and about 3 cups of the flour, and the salt.  Stir this until it is smooth then gradually add as much of the remaining flour as needed to get a nice firm, yet soft and elastic dough.  A little stickiness is good with pizza dough.  You will most likely end up having to kneed in the last cup of so by hand as it will get to thick to stir.  If you have a mixer that will handle yeast doughs, you may accomplish the same thing in half the amount of time and effort.  I do not currently have my mixer.  :o(
Full gluten pizza crust (flatbreat) almost done...
Once the dough is mixed, let it rest for about 1/2 hour, then divide it into about 8-10 pieces.  Flatten each piece into a 8"-10" round (whatever will fit into your frying pan) making sure that it is fairly thin keeping in mind that it will puff significantly as it cooks.  At this point, add the flattened dough to your warmed, buttered pan and cook the dough and pizza the same as mentioned above from step 5 - step 8.

When I made these pizzas I only made four pizzas total for that meal, so obviously I had a lot of dough left over.  I decided to cook all the remainder as just plain flatbread because I had no other way to keep it for later.  This worked out extremely well, because it refrigerated great for up to 3-4 days, just storing it in a plastic food storage bag and was super convenient to pull the crusts out and make up pizzas when I didn't have the time, or space, to go into all the effort to mix up dough again.  I used the same frying pan technique, I just warmed the crusts in the pan before adding the toppings.  These crusts would also freeze good for 1-2 months.


Finished full-gluten pizza crusts.


Wednesday, July 18, 2012

Black Bean Burgers

I like making these black bean burgers a couple days after I make a big crockpot of black beans, using the leftovers.  These are delicious fresh...  they tend to be a little dryer when reheating, but with some salsa and/or sour cream they are still great! 

1 1/2 c. Black Beans, cooked, not rinsed
(if using canned beans, you will want to drain most of the liquid, reserving 2-4 Tbs worth to mix in with beans.)
1/2 c. Crushed Tomatoes, canned (or taco sauce or salsa)
2 tsp. Garlic Powder
1 tsp. Onion Powder
2 tsp. Cumin
2 Tbs Cilantro, fresh, chiffonade
2 tsp. Chili Powder
3/4 c. Cornmeal
1/2 c. Masa Harina
1 c. Quinoa, cooked and cooled, can be the red or white variety
Chipotle Tobasco hot sauce - to taste (or another favorite brand)
Salt & Pepper - to taste

Combine all ingredients in a large mixing bowl and stir by hand until thoroughly mixed.  Scoop the mixture using a 1/3 cup measure and empty it onto a greased skillet, over medium high heat, flattening each "pile" into a patty or "burger" as you go.  I just use the bottom of the scoop to do this.  Cook until the bottom begins to brown and then flip over carefully.  When the burgers are done they should be lightly golden on both sides and firm to the touch.  These can be eaten just as you do burgers, like a sandwich...  or serve them with rice, and freshly made salsa for a beautiful plated vegan entree.


Monday, July 16, 2012

Soft, Fluffier Buckwheat Pizza Crust

So, it's been a while since the last post.  Vacation has a way of making one enjoy the time away from all technology, or at least for me.  As much as computers/internet etc is helpful for keeping in touch with people and learning new information, it is so nice to take a break from it for a while.  My first blog back is about a wonderful gluten-free pizza crust - now that you are eating gluten-free, you should still be able to eat pizza and enjoy it too! 


This crust is awesome!  It can be made ahead of time and kept in the freezer until time to use and it's quality is still as delicious as fresh.  I even took these on vacation to use for my son - they traveled, froze, and refrigerated well.  In addition to traditional style pizza, we also make mexican/taco pizza on these crusts, and use them for garlic breadsticks, and gluten-free croutons, by keeping them in the freezer and thawing them as needed.  You will love how easy this recipe is and the versatility of having it on hand!  For anyone who cannot have the masa harina that is in the recipe you can use same amount of quinoa flour or all buckwheat flour, or feel free to substitute in a different one to your liking!

1 c. Warm Water
1 1/2 tsp yeast, active-dry or instant
2 Tbs Sugar
2 Tbs Olive Oil
2 Tbs. flaxseed egg substitute mixture (see egg-substitute post)
1 3/4 c. Buckwheat flour
1/2 c. Masa Harina
1 tsp. Baking Powder
2 tsp. Salt

In a large mixing bowl, dissolve the yeast in the warm water, and sprinkle with the sugar.  Add the olive oil, flaxseed mixture, buckwheat flour, masa harina, baking powder, and salt.  Stir by hand with a wooden spoon until smooth and dough-like.  This mixture should be very sticky, it will not be as elastic as a "normal" pizza dough, and will not be thick enough to hold it's shape in a ball, but it should not be runny.  It should be just a little moister/stickier than biscuit dough.  When all ingredients are combined thouroughly, drizzle some olive oil over the top (maybe 1-2 Tbs.) just to prevent the top from drying out, and then cover loosely with a clean dry towel and let rest for about an hour.  It should rise a little bit, it probably won't double.  During this time, preheat oven to 475 degrees.  Grease a 14 inch pizza pan.  After the dough has rested, dump the dough out onto the greased pizza pan.  You will need to sprinkle the top of the dough with some additional buckwheat flour, and then using your fingers press gently into a circle, you should be able get it pretty close to a 14" circle.  Place in the oven and bake for about 10 mins, the top will begin to crack in places and the bottom will begin to brown.  Remove from oven and cover with your chosen pizza sauce/toppings.  Return to oven and continue cooking for another 10 mins until all toppings reach the desired doneness and bottom should be browned and slightly crispy.  Remove and let sit for 2-3 minutes before cutting.

If you are just making the crusts to put in the freezer.  Bake for about 15 mins when you first put them into the oven.  The bottom will be golden brown, the top will be cracked in places and it will feel firm to the touch.  Remove crust from the oven and cool on a wire rack.  They keep great in the freezer in an airtight container, or you could wrap them in plastic wrap and then foil and then freeze.

This recipe makes one 14" pizza or two 8" pizzas.  When making crusts for the freezer, I like to double the recipe and make four 8" pizza crusts.  They fit better in my freezer that way.


We try to avoid all Nitrates and Nitrites, so for the pepperoni seen in the pizza pictures above we used the Hormel Natural Pepperoni - it is found in a small brown and red box with the Hormel products in the supermarket.  It contains no Nitrates or Nitrites.


Sunday, July 1, 2012

Apple Coffee Cake w/Warm Vanilla Sauce


This coffee cake is one of the best.  It originated from a "regular" coffee cake recipe that I use quite a bit with just about any fruit including but not limited to rhubarb, blueberries, apples, or cranberries (fresh).  I have not found a fruit yet that is not good in this, so feel free to be creative!  It can be eaten without the vanilla sauce, if you want to cut back on sugar and fat, or if you cannot have dairy (you'll notice that it is mostly butter, sugar and milk...) but it really sends this cake "over-the-top" in the flavor and texture category.  Sometimes, I will use the sauce if serving this as a dessert (pictured below) and omit it if serving the cake for a breakfast item (pictured above).  This recipe uses all quinoa flour, and I would highly recommend that you try it this way too.  I am sure it can be done with a combination of buckwheat and quinoa or just buckwheat, but the results with all quinoa flour is the best results I have had yet working with any gluten-free flours.  This recipe is also egg-free.  If you can have eggs and use them, simply use 1 egg in place of the 1/4 c. flaxseed egg-substitute.  You will probably want to omit the applesauce in the cake batter as well if actually using eggs.  There are more explanations about this egg-substitute in the "Egg Substitutes" post.  I am so excited about sharing this recipe with you and hope that you find it as wonderful as we did!

Cake Batter:
2 Tbs Butter
1 c. Sugar
1/4 c. Flax seed Egg-Substitute (See "Egg-Substitutes" Post)
2 Tbs. Applesauce
2 c. Quinoa Flour
1 tsp. Baking Powder
1/2 tsp Baking Soda
1 c. Milk
1 c. Apples, peeled, cored and diced (or other fruit like fresh or frozen rhubarb, blueberries, cranberries)


Cream together butter and sugar, and then add the flax seed egg substitute and applesauce.  Mix until smooth and creamy.  In a separate bowl, stir together the quinoa flour, baking powder, and baking soda.  Add to the butter mixture alternately with the milk.  Scrape the bowl and continue mixing until all ingredients are incorporated and the batter will be smooth.  Stir in the apples (or other fruit).  Pour into a greased 8" or  9" square pan or a 9" round cake pan.  Sprinkle the Struesel Topping (recipe below) over the entire surface of cake, make sure to use the full amount of topping that you have, it might seem like too much, but it will be perfect once the cake is baked.  Bake cake at 350 degrees F for 30-40 mins.  The topping should be lightly browned and a toothpick stuck in the middle of the cake should come out mostly clean with possibly a moist crumb or two on it, but nothing gooey.  Let cool for 10-15 mins before cutting.  This cake is still absolutely delicious at room temperature with or without the optional Warm Vanilla Sauce (recipe below).


Struesel Topping:

1/4 c. Quinoa Flour
1/4 c. Sugar
2 Tbs. Butter, cold

Mix together the flour and sugar in a small bowl.  Cut in the butter until all pieces are smaller than the size of peas.  Sprinkle over unbaked panned caked batter.

Warm Vanilla Sauce (Optional, but Highly Recommended):
1/2 c. Butter
3/4 c. Sugar
2 Tbs. Cornstarch
1/2 c. Milk
1 tsp. Vanilla

Mix together the sugar and cornstarch until there are no lumps.  Place into a sauce pan with the remaining ingredients.  Cook on medium low, whisking, until the butter is melted and everything is incorporated.  Turn heat to medium high and cook until the mixture comes to a boil, turn heat down to medium low and continue to boil for 2-3 mins.  The mixture should thicken to a nappe consistency (cling to back of spoon) and have no starchy texture/flavor when you taste it.  Remove from heat and cool for about 10 mins before drizzling over cake, it will thicken just a little more as it cools. 


Apple Coffee Cake w/Warm Vanilla Sauce
                      

Tuesday, June 19, 2012

Buckwheat Pancakes (GF/EF)


These pancakes come out soft and tender, of course not as light as a regular pancake but superior to most other recipes I have tried for Gluten-Free, Egg-Free.  This particular recipe does have milk in it, but it works great with other non-dairy milks if you are dairy-free.  One of our favorites is the almond milk, but it also works great with soy, coconut, and rice.  I have made pancakes with part orange juice as well - makes a great orange ginger pancake, by adding about 1/2 tsp ground dry ginger.  Be creative with these!  We like them with apples and cinnamon or blueberries.  They are good with mini chocolate chips as well.  Sometimes I just add a teaspoon of cinnamon to the plain batter just to liven up simple pancakes.  And, of course, always serve them with REAL maple syrup!


1 1/2 c. Buckwheat Flour*
1/4 c. Granulated Sugar
1 tsp. Baking Powder
1/2 tsp Baking soda
2 Tbs. oil (vegetable oil, light olive oil, or coconut oil)
1 c. Milk (regular or non-dairy)
1 tsp. vinegar
1/4 c. flaxseed egg substitute (see info on "Egg Substitutes" post)
1/2 tsp vanilla
2 Tbs. applesauce

Combine all dry ingredients in a mixing bowl.  Add all the wet ingredients into the bowl with the dry, and whisk until smooth.  That is one beautiful thing about working with gluten-free flours, you really can't over mix a batter.  For instance, with regular pancake batters or muffin batters made with wheat flours, over mixing will produce a heavy, tough product.  I have not found this to be true of the gluten-free flours.

Pancake is ready to flip!
Heat a skillet to medium low heat.  When skillet is hot, grease it with butter.  I use butter to grease pan, but again if you are dairy-free, veg oil, coconut oil or light olive oil will also work.  Ladle batter onto skillet into pancakes, I use a 1/4 cup measuring cup as a ladle for small pancakes, or a 1/3 cup measuring cup for slightly larger pancakes.  Flip pancakes when they start to get bubbles on the top and edges and parts of top look set.  See photo to the left.  Both sides should be a nice golden brown color.  If the pancakes are not getting golden but are cooking through, turn the heat up, if the opposite is happening where they are getting too dark, but the middle is not setting up fast enough to turn them, turn the heat down slightly.

This recipe makes about 8 pancakes when using a 1/3 c. measuring cup as a ladle.  Leftovers keep well in the refrigerator for up to 3 days, reheating them quickly on a hot skillet works great!  They are also good eaten like toast with Sun Butter or almond butter (if you can have those.).

*This recipe does work well substituting 1/2c Masa Harina for 1/2 c. of the buckwheat flour.  I do this when I am running low in buckwheat flour, but have plenty of Masa.  

 YUM!  ENJOY!


Monday, June 18, 2012

Thin Pizza Crust

This pizza crust comes out thinner and crunchier than a regular pizza dough.  I guess some would compare the final product to the texture of a frozen, ready to cook pizza that you can purchase at your local grocery store.  We do like this crust a lot!  The batter is very easy and versitile, as well as the finished crusts.  This recipe uses mainly garbanzo bean flour, so it is super healthy, with lots of protien and the flavor goes great with the pizza sauce and any toppings you like.   (unfortunately I have no pictures of this yet, but will post one the next time I make it.)

1 c. garbanzo bean flour
1/2 c. cold water
1 T olive oil
1 tsp salt
1/2 tsp granulated onion
1/4-1/2 tsp granulated garlic
1/2 tsp sugar
2 Tbs flax seed egg substitute mixture (see info in the "Egg Substitutes" post)
1/4 c. Parmesan cheese (optional)

Combine all ingredients in a food processor and blend until totally smooth.  This is almost fail proof, you could blend it for 30 secs or several minutes and results won't change as long as the batter is smooth.  This should look like a pancake batter consistency, may need a little more water added, just add a couple tablespoons at a time until you get the desired consistency.  You can refrigerate this for up to three days until ready to use.

When ready to cook the batter:  Heat a 12" cast iron pan over medium heat, until it begins to smoke (but you don't want to fill your house with smoke, lol).  Example: my stove burners have heat levels that go from 1-10, 1 being low, 10 being high, and I put it on 5.  Place 1 Tbs of butter in the pan and let it melt. (if you are dairy free, coconut oil or olive oil should work fine for this).  When the butter is completely melted, ladle about 1 c. of batter into middle of the pan, the batter should spread out a little bit when put in there, but not run to the edges by itself.  Use an offset metal spatula (like one you would use to frost a cake...) to spread the batter almost to the edges of the pan.  Essentially you are making a pancake out of this batter.  Let this cook on the first side for about 5 mins or until the top of the batter no longer wet to the touch, and it will look like it is smoking from underneath and will be browned, similar to how a tortilla may look, but not black.  Carefully, using a large round shaped spatula, flip this large "pancake", and cook until the second side is browned.  Remove from pan and cool on a wire rack.  When these are cool they can be stored in the refrigerator for up to 5 days until using.

When making the pizza on the crust:  I like to use canned crushed tomatoes, spreading this onto the crust, and then sprinkle on the sauce a combination of granulated onion, granulated garlic, dried basil, dried oregano, salt and pepper, sometimes some parmesan cheese, and then the pizza cheese and toppings*.  For those of you who are dairy free or vegan, feel free to use whatever cheese you like.  Then bake in a preheated 475 degree oven on a cookie sheet or pizza pan until cheese is melted and bubbly, sometimes a few golden spots are good, and the crust should be slightly crunchy/crispy on the bottom.


This recipe makes one crust.  I like to quadruple this recipe to get 4-5 crusts and keep a couple of the crusts on hand in the fridge for lunches or spur of the moment gluten-free meals.

* My son's favorite topping is the Hormel Non-Cured Pepperoni, comes in a small brown and red box- it has no nitrates/nitrites or other preservatives.  I love this pizza with caramelized onions, diced tomatoes, and other veggies!  A lot of times I will eat this crust over the original pizza crust!


Egg Substitutes


Egg Substitute Powders

When I first found out that my son was allergic to eggs, I immediately went out and purchased the "ENER-G" brand egg replacer to use in baked products.  It works ok, but the ingredients include cellulose gum and carbohydrate gum.  I am actually trying to avoid using any of the "gums", xanthan gum included, due to the findings that it may cause problems in the digestive track over a long period of consumption.  From my understanding some people never experience adverse reactions to it, and some do.  At this point I figured it is safer for my son not to have to deal with another possible health issue.  I do use an all-purpose baking mix such as "Pamela's Baking & Pancake Mix" (can be purchased on Amazon.com if you can't find it in a local store) very ocassionally and it does contain the xanthan gum.  So I am not saying that I am boycotting the stuff, just being careful of the amount that we consume.

Ground Flax Seed
The best one I have found so far is ground flax seed.  Mixing one tablespoon of the ground flax seed with three tablespoons of warm water and letting it sit for a few minutes will result in a very eggy textured mixture.  This amount is equivalent to one large egg in the use of baking.  You can also use the ground flax seed to replace xanthan gum that is in recipes if you choose to.  Usually if a recipe calls for one teaspoon of xanthan gum, one tablespoon of the dry ground flax seed will work.  If you are working with a recipe that has eggs and xanthan gum in it, simply omit the xanthan gum and just make the substitution for the eggs...  it should work beautifully!  And what's more is it is an extremely healthy addition to the recipe, where as the powdered egg substitute is mostly starches and gums...  very little nutritional benefit.  With this flax mixture you can mix a bigger batch of it (1 cup ground flax seed and 3 cups warm water, it's always a 1:3 ratio), let it sit until it looks gooey like an egg consistency and keep it in an airtight container in your refrigerator.  It will be ready to use when you need it for up to a month.  Simply use 1/4 c. of this mixture for every egg that you are substituting.  In most recipes where I have used this substitute the end product comes out very close to a product that has eggs in it.  I have also experienced that you will have a better result from this substitute if it is from the big batch method and has been in your refrigerator for at least a day or longer.

Fruit Purees
Sometimes, in addition to the flax seed substitute I will use one to two tablespoons of applesauce or prune puree to add moisture to a recipe.  I do not use them for the complete substitution, because they do not have the binding qualities that eggs and flax have, but they work amazingly well for adding moisture.  You may have used the purees before for substituting fats or a portion of the fat in a recipe in baked items, I still occasionally do this from time to time as well, depending on the recipe. 

Chia Seeds
I have not actually tried the chia seeds yet, but have heard greatness of them!  From my understanding they work the best if they are ground into a fine powder and then used in the same ratio as the ground flax seeds:  one tablespoon seed powder to three tablespoons warm water, let sit for a few minutes until the mixture is thick and gooey, equals one egg.  When I finally get around to trying these I will let you all know what I think, but would love to hear comments from anyone who has tried them.  The people who I have heard of trying them all love them!  And yes, these are the same seeds used in the famous chia pets...  who knew...?

These are all substitutes for baking, you cannot make scrambled eggs out of any of these... LOL... that is what my son asked when he first saw the box that said "egg substitute", and he was so disappointed! :o)  There may be more substitutes than these that I am not aware of yet.  If you have tried anything other than these, it would be fun to hear about it!  Please comment!

Saturday, June 16, 2012

WELCOME!


Welcome to Living Free!

This is a blog to help anyone out there who may be struggling with specialty diets.  It is a challenge to change the way you eat and figure out food substitutions or answer the question: "what do I eat now?"  My son has several food allergies:  all wheat products, gluten, eggs, peanuts, yogurt, and oats, so we are experiencing this challenge first hand.  We found out about his food allergies just six months ago at ten years old, and he was so worried about what he couldn't have.  So we talked about all the things he could have and what an adventure it will be to try so many new foods and to feel better on top of it!  So we went shopping together to look at the new options and we read recipes together to see what we wanted to try next.  We have learned many new things and I have developed many new recipes and figured out some great substitutions.  I have seen my son become a new person with a new outlook on life!  It is simply amazing!

On top of all of this I have met so many people who are struggling, or know someone who is struggling, with a change in eating habits whether by necessity or by choice, and I want to share what I have learned.  I want you to be able to experience the same change in life that my son has, so, this blog is meant to help you and become a resource for you.  Here you will find recipes and substitution ideas for many allergy situations as well as vegetarian/vegan options and any other resources that I find that help us, I want to pass that along to you!  I am still learning and desire to post as I learn and as I make new things, I will share.  I hope that you will intern also share your thoughts and ideas on things that you try and figure out as well. 

So in light of living free of your allergens:  Enjoy reading, learning, cooking, and most of all EATING!