
Yes, you can have homemade pizza even if you do not have an oven...
...or maybe you have a broken oven...
I am currently in this dilemma. God has moved me and my family to a wonderful part of the country (hence the Long Time-No Post), and I love where I am, however, the temporary, furnished, living quarters that I am in has no oven. I am working with
a microwave,

two burners,

one small stock pot (probably holds 1 gallon),

two, 1 qt sauce pans,

and a 10" frying pan.

Cooking utensils include 1 metal spatula (which I did purchase at the dollar store... only a plastic one was here when moving in, and it would melt when it got hot..hhhmmm.),

and 1 plastic spoon/ladle thing.

Other than than I have 4 each metal forks, knives, and soup spoons, and also collection of "our best" plastic-ware direct from Target!

I did bring my chef knife with me, for which I am extremely thankful and there is a small somewhat decent cutting board here.

So all in all, I have had the challenge of thinking up meals for four people with limited equipment. On top of that, figuring out the gluten, egg, peanut, etc - free meals for my son all at the same time. Before moving, our family tradition had become homemade pizza every Friday night, which meant making a gluten-free crust for my son and the "normal" high gluten crust for everyone else. After moving it had been about three weeks or so since we had pizza of any kind because it is so hard to find a pizza shop which sells a gluten-free crust, and we were all really craving some of that comforting homemade pizza... You know how it is! So, one Friday night, I got my determination on, and got all the ingredients, pulled out my stock pot "mixing bowl" and got to work!! In my little kitchen area, I managed to make a HUGE mess (I am really good at that, just ask my husband!) but came up with this GREAT FRYING PAN PIZZA!
- Simply use the Buckwheat Pizza Crust recipe that I have already posted previously, EXCEPT add more warm water to the mixture to make it closer to the thickness of a pancake batter. Don't worry about over mixing, gluten-free flours typically cannot be overworked. I usually let the mixture rest maybe a half hour before using.
- Heat a heavy bottom frying pan (a cast iron one would work great!) to medium low heat, have the lid ready nearby.
- Place enough butter in the pan to coat the bottom well.
- Spread the mixture carefully around the pan until it reaches the sides, if the batter is too thick, this will not work and you will end up with a very thick clump of half cooked dough in your pan.
- Place the lid on the frying pan and let it cook for about 3-5 minutes. The bottom should be cooked and light brown and the top should be set, not raw, but it will look undercooked.
- Now is the time to flip! Turn the crust over, CAREFULLY, with your dollar store spatula, as not to break the dough nor bend the $1 spatula.
- Immediately after flipping the dough, spread on your choice of sauce, cheese or cheese substitute, and toppings.
- Cover with the lid once more for 3-4 minutes, until the cheese is melted. It will not get bubbly and golden like it would in a "normal" oven, however it is awesome pizza when an oven is not available.
 | |
| Step 4, spreading the batter... |
 |
| Step 5, after it has been cooked with lid on... |
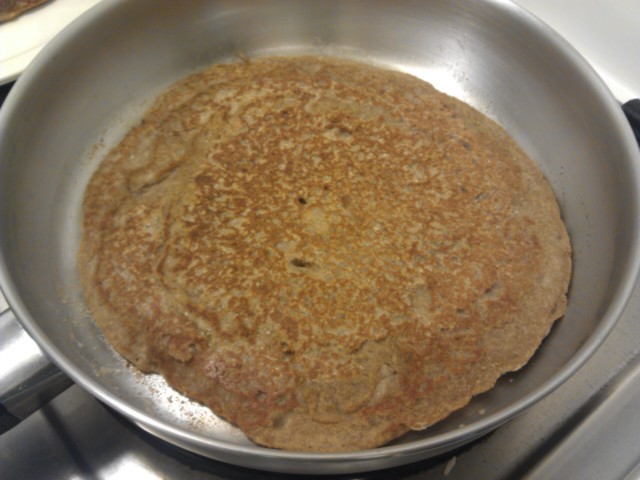 | |
| Step 6, a finished gluten-free pizza crust. |
Even if you have a working oven, have fun trying this technique out... It is fun, even though it takes a while because it makes one personal size pizza at a time, but it is SO worth it!
**********************************************************************************
MAYBE you can have gluten (lucky), and would like a good quick pizza dough recipe?? Here it is; the one I used for the rest of the frying pan pizzas. Be sure to cook your gluten-free crusts first, if having to use the same frying pan for both type crusts in the same meal, to prevent cross-contamination!
FULL GLUTEN PIZZA DOUGH *Caution: do not consume if you are allergic to gluten!*
1 1/2 cups warm water
1 packet (1/4 oz.) of instant (rapid rise) yeast
1 Tbs granulated sugar
2 Tbs. olive oil
4-6 cups of all-purpose unbleached flour (bread flour works great for this too, I just happened to have AP flour)
1/2 Tbs salt
 |
| Raw full-gluten pizza dough placed in frying pan. |
 |
| Full gluten pizza crust (flatbreat) almost done... |
When I made these pizzas I only made four pizzas total for that meal, so obviously I had a lot of dough left over. I decided to cook all the remainder as just plain flatbread because I had no other way to keep it for later. This worked out extremely well, because it refrigerated great for up to 3-4 days, just storing it in a plastic food storage bag and was super convenient to pull the crusts out and make up pizzas when I didn't have the time, or space, to go into all the effort to mix up dough again. I used the same frying pan technique, I just warmed the crusts in the pan before adding the toppings. These crusts would also freeze good for 1-2 months.
 |
| Finished full-gluten pizza crusts. |
No comments:
Post a Comment